
How I Play Dragon Quest X on Linux
Created September 3, 2026
Dragon Quest X is a massive multiplayer online role-playing game (MMORPG) in the famous RPG series by Square Enix. Originally released in 2012, it has appeared on many consoles, including the Wii, Wii U, PC, PlayStation 4, Nintendo Switch, and Nintendo 3DS. Although it has never officially left Japan, the game remains very active today. I am currently playing the free trial version and have not purchased any of the expansions. This guide will focus strictly on the installation and setup process for Linux. For certain account-related steps, I will direct you to external resources.
Setting up a Japanese Square Enix Account
The Adventurer's Abbey at https://dqxabbey.com/ offers a fantastic tutorial on setting up a Japanese Square Enix account and activating the free trial. They also provide a VPN setup guide for players outside of the United States. I will not cover those account creation details here. You can find their getting started guide right here. Be sure to complete the registration steps, but skip their specific downloading and installing section, as we will be using a Linux-specific method.
Installing Dragon Quest X
I used the information from the Ethene Wiki to help put this tutorial together. We will be installing the game through the native Linux Steam client. The first step is to run the following Bash script in your terminal, which will launch the installer interface shown below.
$ bash -c "$(curl https://gist.githubusercontent.com/jmctune/6322356f5bdb7bb00ca39cc0fa84546f/raw/dqxclarity_steam_deck_install.sh)"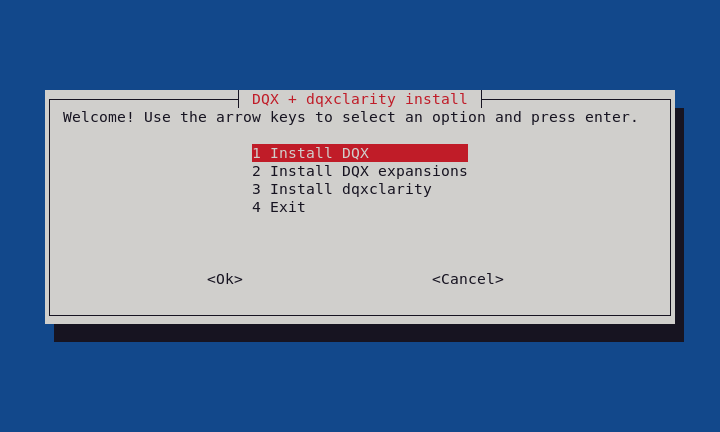
Choose option one to install Dragon Quest X. The script mentions the Steam Deck, but the process is identical for a standard Debian Steam setup. I am skipping option two because I do not own the expansions, though you can adjust these steps if you do. After the initial phase, closely follow the prompted terminal instructions below. Do not interrupt these instructions. I have omitted screenshots for this section since the terminal outputs your specific filesystem locations. Remember to replace user with your actual Linux username.
==> Follow these instructions! <==IF THIS PROCESS IS INTERRUPTED, YOU WILL NEED TO START FROM THE BEGINNING.
- Go to the /home/user/Downloads directory and extract the DQXInstaller_ft.zip in the same folder.
- Add a new non-steam game through Steam. Click Browse and navigate to this directory:
/home/user/Downloads
- Inside the extracted folder, select "dqxinstaller_ft.exe" and click "Open". Click "Add Selected Programs" to add it to your library
- It'll show up as "dqxinstaller_ft.exe" in your library. Right-click it and select "Properties..."
- At the top, delete the text "dqxinstaller_ft.exe" and type "dqxclarity"
- Select "Compatability" and check "Force the use of a specific Steam Play compatability tool"
- Click the drop down and select "GE-Proton10-26"
- If you don't see this version, you need to install GE-PROTON first.
- Close out of the window, make sure "dqxclarity" is selected and click "Play"
Once you've clicked "Play", the script will automatically continue.
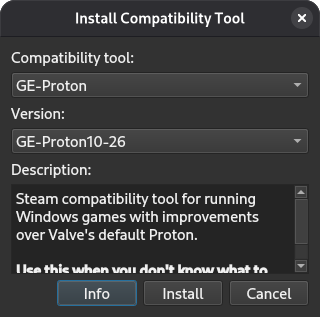
You must install GE-Proton before opening the custom shortcut in the Steam client. To install GE-Proton10-26, use ProtonUp-Qt. This application installs and manages Proton-GE for Steam using a simple graphical interface. You can download the AppImage directly from the software's website. Make sure you mark the AppImage as executable in your terminal before running it:
$ chmod +x ProtonUp-Qt*.AppImageThe software is also available via Flathub. If you already have Flathub configured on your system, simply run the following command:
$ flatpak install flathub net.davidotek.pupgui2Open ProtonUp-Qt and click the "Add version" button. Find GE-Proton10-26 and install it for your Steam client.
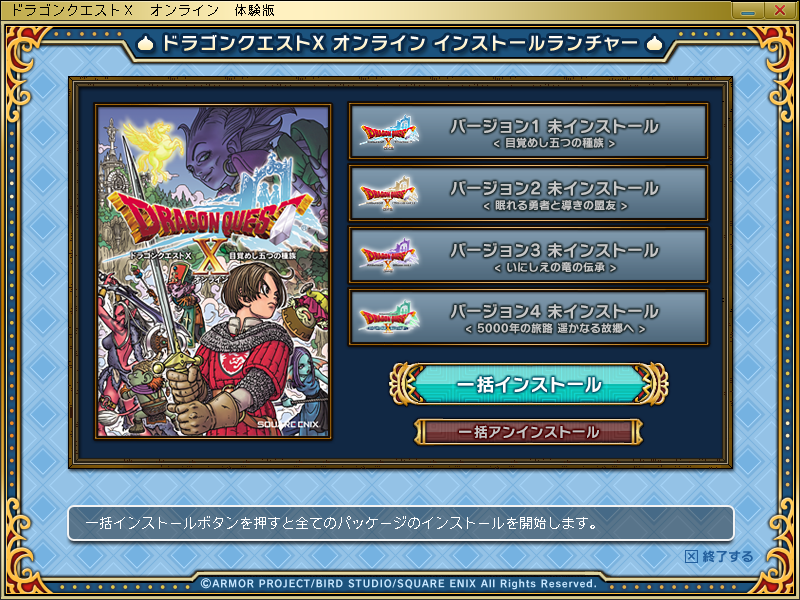
Leave the terminal installer running in the background. Once you press "Play" in Steam, the official Dragon Quest X installer will launch. Click the light blue button to begin the installation. You will receive a confirmation prompt for the free trial software; simply click "OK." Navigate through the installation wizard by repeatedly clicking the button marked "(N)". When the Terms of Service appear, select the top bullet point and proceed. Use the default installation directory. The final prompt will ask to create a desktop shortcut; ignore it and click the second button to "Finish." Allow the launcher to verify the installation, then close the window. We need to install a few more components before returning to our terminal script.
We need Protontricks to install the .NET framework required for DQXClarity. First, install pipx and winetricks from your distribution's repositories.
$ sudo apt install pipx winetricks -yNext, install Protontricks using pipx. You will need to either reopen your terminal or reload your bash configuration before you can launch the Protontricks GUI.
$ pipx install protontricks$ source ~/.bashrc
$ protontricks --gui
Using Protontricks, install .NET 9.0 by following this process: Open the application, scroll down until you see your non-Steam shortcut, and click OK. Next, choose "Select the default wineprefix" and click OK. Then, choose "Install a Windows DLL or component" and click OK. Finally, scroll down to select "dotnetdesktop9", click OK, and follow the installation wizard until it is complete.
Return to the terminal script and follow the next set of prompts below. Once again, remember to change user to your username and use your specific Steam appid. Note: During my first launch, the game froze on the opening movie, and I could not close the window normally. If this happens, you can use the xkill command in your terminal to force it closed.
==> Follow these instructions! <==Now that the game is installed, we need to patch it!
Reuse the "dqxclarity" entry you added earlier and update the target.
- In Steam, right-click the "dqxclarity" entry in your library and select "Properties..."
- Under TARGET, update the path to:
"/home/user/.steam/steam/steamapps/compatdata/[your steam appid]/pfx/drive_c/Program Files (x86)/SquareEnix/DRAGON QUEST X/Boot/DQXBoot.exe"
- Under "LAUNCH_OPTIONS", insert this:
PROTON_USE_WOW64=1 STEAM_COMPAT_DATA_PATH="/home/user/.steam/steam/steamapps/compatdata/[your steam appid]" %command%
- Close out of the window and click "Play".
This will launch the game and start the regular update process.
- After the first update completes, the window will close and the game will exit
- You will need to click "Play" again to continue the update process
- The DQXConfig window will open. It won't be in English - just click OK
- On first launch, the opening movie will play, but does not render in linux. Go ahead and close it.
** If the window won't close, minimize it and click "Stop" in Steam.
- The game will now start patching
This part of the install process is complete, but make sure you let the game finish patching before proceeding with the other steps.
Press ENTER to return to the main menu.
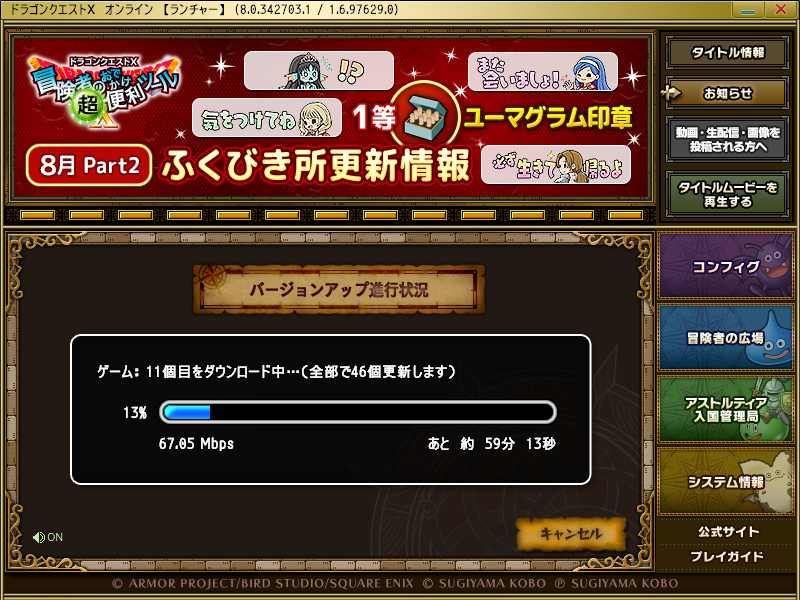
Although the initial installer script instructs you to use GE-Proton10-26, I achieved the best stability using Proton-CachyOS. Download and install the latest version of Proton-CachyOS via ProtonUp-Qt and switch the compatibility tool in Steam. Furthermore, to fix rendering issues with pre-rendered cutscenes, you must install wmp11 via Protontricks. Run this command in your terminal:
$ protontricks [your steam appid] wmp11Finally, add the following to your Steam launch options (alongside the previous commands) to properly enable the cutscene fixes:
WINEDLLOVERRIDES="qasf,wmvdecod,wmadmod=n,b;d3dx9_43=n,b"Installing DQXClarity
DQXClarity is an ongoing AI translation project that makes it significantly easier for English speakers to play Dragon Quest X. To install it, return to the terminal shell script and choose option three. Follow the prompt below, ensuring you swap in your correct user and appid. Be sure to keep the launch options we added earlier alongside the ones requested in this step.
==> Follow these instructions! You're almost done! <==- In Steam, right-click the "dqxclarity" game entry and select "Properties..."
- Under TARGET, update the path to:
/home/user/.steam/steam/steamapps/compatdata/[your steam appid]/pfx/drive_c/users/steamuser/dqxclarity/dqxclarity.exe
- If you haven't already set the launch options from a previous step, paste the following into the "LAUNCH OPTIONS" field as one line:
PROTON_USE_WOW64=1 STEAM_COMPAT_DATA_PATH="/home/user/.steam/steam/steamapps/compatdata/[your steam appid]" %command%
- Close out of the window, make sure the entry is selected and click "Play"
Once you've clicked "Play", dqxclarity will launch.
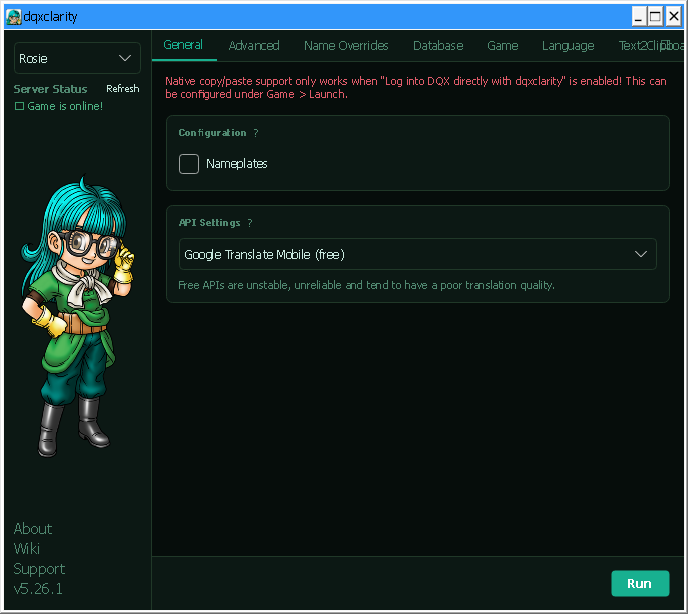
While DQXClarity provides direct in-game translations, I highly recommend visiting the DQX Translation Project webpage to better understand how the software works. Once configured, this tool acts as your new game launcher. To clean things up, you can update the "Start In" field of your Steam shortcut properties to match your installation directory. You can also rename the shortcut and apply custom artwork from SteamGridDB. If you ever decide to purchase the full game, expansions, or set up a recurring subscription, check out the Adventurer's Abbey Payment Guide. Enjoy your time in Dragon Quest X!